
In this article, I am going to show you exactly step-by-step how you can start with historical optimization of your old blog posts and old pages to double your organic traffic and leads for your business.
Historical Optimization of old blog posts is one of the most efficient strategies marketers can use to drive high organic traffic and leads for their business. 51% of companies say updating old content has proven the most efficient tactic implemented. (SEMrush 2019)
This simple yet powerful strategy can increase your article’s lifespan and fill up your content marketing calendar.
But Historical Optimization strategy is overlooked by many marketers and unfortunately, only 38% of bloggers are updating older articles.
(source)
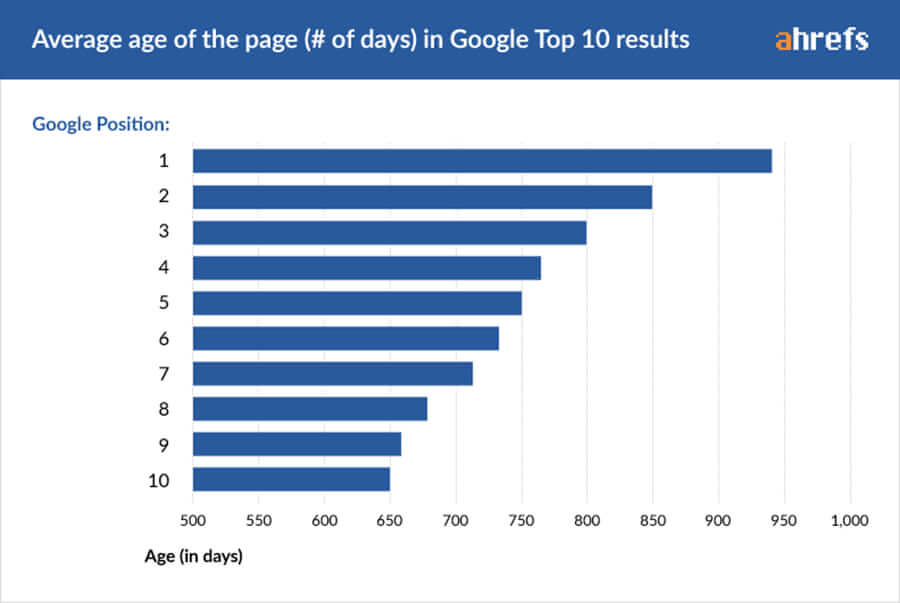
But to get on top of the Google Search results you must start updating your old content to keep it fresh and up to date. Because according to Ahrefs research, the average Top10 ranking page is 2+ years old. And those that rank at position #1 are almost 3 years old (on average).
That means new articles rarely show up on the top of the page and if you want to have a chance you must start optimizing your old pages because nobody will visit outdated content on your website.
So without further due, let’s get started with the historical optimization of your old articles.
Step #1 Find 1+ Year Old Blog Post Used to Perform Well
The first step how to start with the Historical Optimization of your blog posts you must analyze the blog posts that used to perform well on a search engine but not anymore.
And this is a relatively simple task to do that as if you were using Search Google Console since the beginning you have your website.
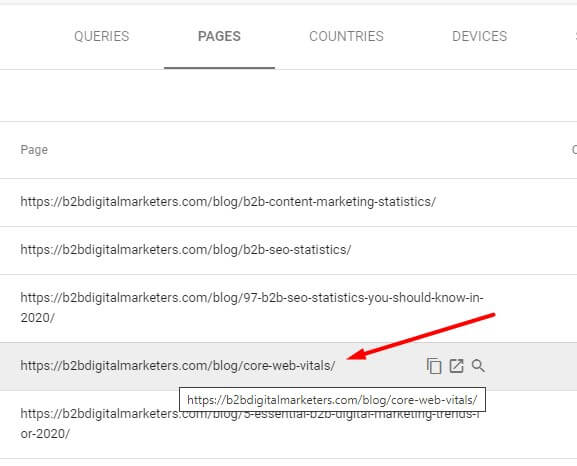
So, head inside your Google Search Console and go to Performance, and select Pages next to the Queries tab.

In this section, you can see all your indexed pages, how many impressions they are getting, their average position, CTR, what countries are visiting them the most, etc.
Now let’s change the date so you can see data from a year back and decide which blog posts need historical optimization to increase ranking, organic traffic, and lead generation.
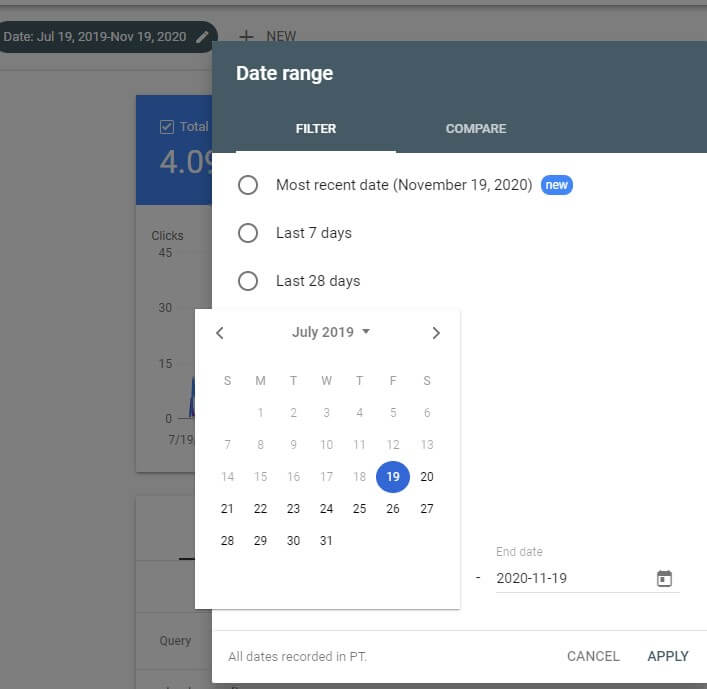
Alright, and once you have changed your data then simply check blog posts that have a lot of impressions one by one.
Here you are searching for blog posts that used to have a high ranking, with a lot of clicks and high impressions. Also, if you have historical data within your CRM or any other software, knowing what blog posts drove the greatest number of subscribers or leads will help you to make a better decision.
But I would not spend too long on this as there is a lot of work waiting for you, just take an hour or two to find the best 20 blog posts on your website that needs an update.
Step #2 Find Relevant Keywords the Blog Post Ranked but Are not Properly Mentioned
Alright, the second step after you have decided what blog post you want to start with historical optimization you have to find relevant keywords that your blog posts ranked for, but you did not mention them.
Again, you can go back to your Google Search Console profile and click on the selected blog posts which will show clicks, impressions, CTR, and average position only for the selected page.
Once you have clicked on the page then you can see all the information to start with the historical optimization for your selected old blog content.
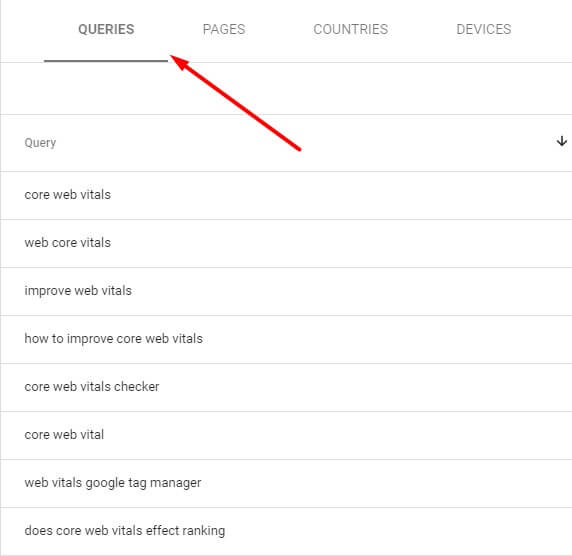
Here I want you to click on the queries to see all the keywords your old blog post was and is ranking for and also sort the keywords by the highest number of impressions by clicking on impressions.
Also do not forget to include display all four statistics:
- Total of Clicks
- Total Impressions
- Average CTR
- Average Position
So, you can get an accurate picture of how the keyword is performing. I would start with keywords that got a lot of impressions but not a lot of clicks. You can see it as those keywords have a low CTR percentage.
Okay once you start searching for the keywords within your Google Search Console I also want you to open the old article that you want to optimize and use the search bar to search keywords within your blog content. You can just click CTRL + F or Command F on Mac and the search bar will pop up on the top right corner.
And now we will search for keywords that your old blog post was ranking for, but you have not covered it or even properly mention it within the article.
Just go one by one and if you feel like the particular keyword was mentioned more than enough I would say at least 2-3 times should be enough, then go to the next one.
Here you are searching for 1-2 keywords that your old blog posts are getting quite a lot of impressions and also have the potential to expand your old blog articles as another topic and add extra value and information that you have not included previously.
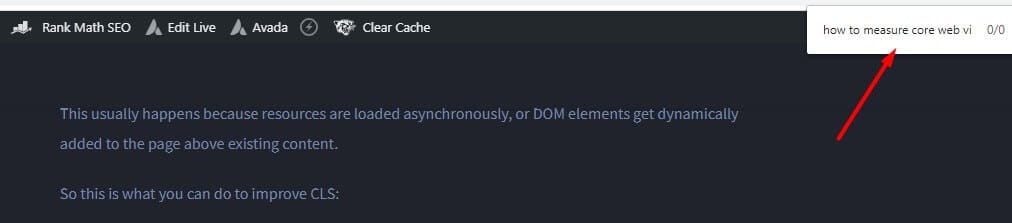
In my example, I have found two keywords “ how to measure core web vitals “ and “core web vital tools” that I have not used within my article but are excellent for to be included.
And like this, you will find related topics that are not included within our old blog content and you can expand on the blog post.
Step #3 Add New Section with the New Relevant Keywords
The next third step to do historical optimization of old blog content is to include your newly found keywords/topics within your article.
This is relatively simple, just open your word or any document program and write the new section of your old blog post.
So, in my case for the core web vitals article, I will add extra two more sections based on the two keywords I have found within the Google Search Console.
So, my article will include these extra sections based on the found keywords I have mentioned:
- How to Measure Core Web Vitals
- Essential Tools to Use for Core Web Vitals
And like this, I can expand my article by another 600-1,000 words depending on how deep I can go and how many sub-sections I will include.
Because remember, the longer the article gets the more keywords it can rank for and yield better results. Bloggers who write articles of 2,000+ words are far more likely to have strong results but not everyone can write 2,000+ all the time and like this, you don’t need to.
So this strategy not only helps to ramp up my ranking for those keywords but generally for all queries within the old blog post and also adds extra new keywords that the article can rank for in the future.
So I hope you are getting the rhythm of how you should go about your historical optimization of old pages. (Note this works not only for blog posts but for pages as well)
But there are a few more steps to effectively apply a historical optimization strategy for your b2b content marketing.
Step #4 Update Statistics and Any Historical Data within the Blog Posts
The fourth step is to read your entire article and update any outdated resources you have used within your old blog posts like statistics, case studies, graphs, visuals, and other materials you have used within your old article or page.
As time goes by, and you are getting better or your company is getting better there are always things we can improve within our old articles.
As I believe, you and I are at least a bit smarter and wiser than a year ago and therefore if you will read your old article you can explain some things better and provide more details.
(source)
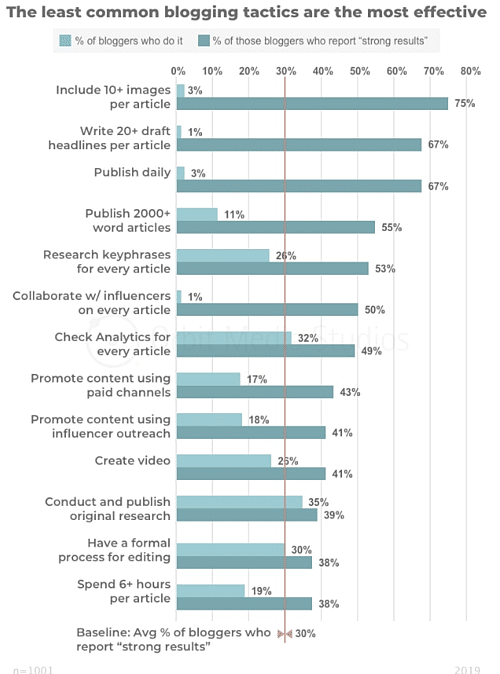
Also, you can add more visuals and data within your old blog posts to prove your points even more. According to a recent Orbit Media study, while only 75% of bloggers that place 10 or more photos in an article say it’s effective, only 3% of bloggers actually do this.
Or sometimes you will find yourself talking absolute nonsense and you will have to rewrite the whole section to fix that.
Therefore, always make sure you not only add extra sections but refresh the whole article with the latest trends, stats and information, more relevant visuals, and others to improved the quality of your old articles.
Like this, you can make sure that Google will not penalize you as Google can actually penalize you for republishing old content without adding extra value.
And while it is difficult to say how much you need to change within the article I believe that adding an extra section or two, updating information and visuals, and rewriting some of the section is enough to successfully republish blog articles for Google to reward with a better ranking, more impressions and more organic traffic to your republished article.
But let’s move to the next step.
Step #5 Optimize for SEO & Your Current Conversion Path
Once you have rewritten your old article now you have to optimize it for your current conversion path to not only generate organic traffic but leads for your business as well.
This means replacing any old call-to-action (CTA) with a new one, adding or changing your content upgrades with the latest one and more relevant, and use the Middleman method to increase the authority of your product and service pages.
The important aspect of this part is to ensure your blog posts follow your current buyer journey to ensure your users can also convert as leads for your business.
Because the number one goal for writing articles is to attract your b2b target audience to your website and convert them into SEO leads for your company.
Also, a very important part is to optimize your old blog article with SEO tactics to ensure you are not:
- Referring to 3xx, 4xx, and 5xx pages
- Having an old meta description
- Forgetting update your internal linking
- Having pictures without alt-text
- Forgetting adding outbound links to your posts
And of course, there are more B2B SEO strategies for blog posts that you should check and optimize your old blog posts with.
Because writing an excellent article could be wasted if you are not following SEO guidelines. Because writing great articles also includes optimizing it with SEO strategies to get the best results from your hard work.
Step #6 Publish Your Blog Posts as New by Changing Its Publish Data
Once you have finished all the steps for historical optimization of old blog posts and pages now is time to just changed the publish date within your article.
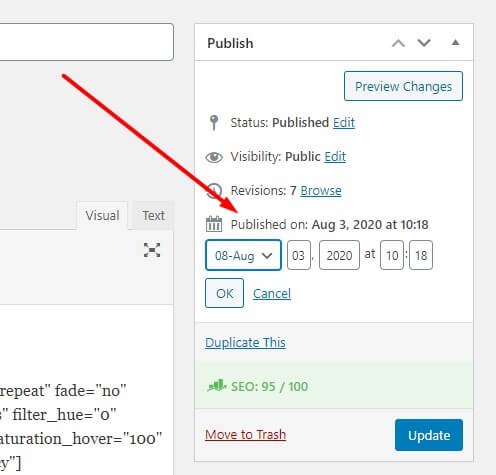
This is very simple if you are using WordPress or any other CMS for your website as you can just simply select “Published on:” and change it to your actual date and time.
The setting might differ based on what version of the article editor you are using. For me, I am using the Avada theme, so I have changed it to the default setting to show you.
Here is how it looks like for the default version.
And here is the second version if you are using Gutenberg block editor.
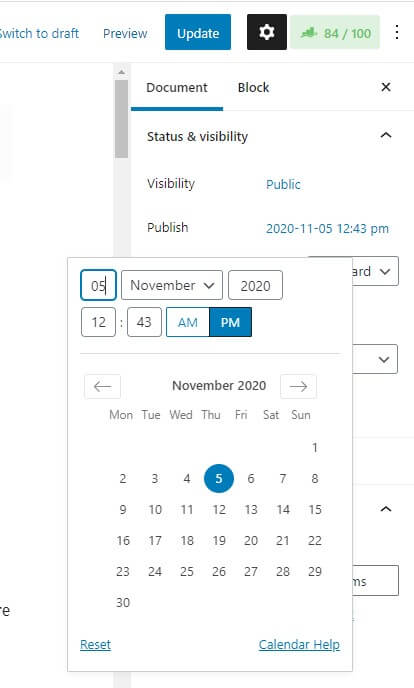
But both versions you can find on the top right corner, also if you are using some of the premium WordPress Themes it might differ, and therefore ask them for help to show where you can change the publish date within their theme.
After updating the date to your current one, simply hit publish and take the URL of your historical optimized article and paste it into Google Search Console URL inspection.

So, Google can crawl it again and discover faster your newly updated blog article and you can see the results faster. Usually, it takes a couple of minutes but on some occasions, it can take a day or even a week so be patient.
Step 7# Promote Your Newly Historical Optimized Article the Same Way as New
And the last step you should take is to promote your newly historical optimized article the same way as you do when you publish a new article on your website.
Well, this step is totally up to you and the way how you are promoting your article, but if you are not promoting your new articles in any way I recommend you to start promoting.
Because promoting your content helps you get the initial engagement which is important for your Article to quickly start ranking at a better position than 70+.
Therefore, always make sure you are promoting your new articles and your newly optimized articles as well.
Historical Optimization Best Practices
And the very last thing that I want to share with you is some of the best practices for historical optimization of your old blog articles and pages to ensure you are getting the best results.
So these are the 6 best historical optimization practices of old blog posts and pages I want to mention:
- Focus on older than 12 months article that used to perform above average as a first.
- Always make sure your content has at least 20% new content before you resubmit the page, so you avoid getting a penalty from Google.
- Updating your CTA is an important aspect for you to not only drive organic traffic but convert that traffic into leads.
- Add new or more relevant offers to increase your conversion rate. I prefer to focus on the keywords my article ranked most and add offers based on that.
- You should add a historical optimization strategy into your marketing mix as a regular part of your marketing activities.
- Also update blog posts that have a high conversion rate but do not get that much attention is a great and easy way to increase leads for your business.
And these are some of the best practices for your historical optimization. Once you will start optimizing your content you will quickly find out that it is a lot easier than writing an entirely new article.
And, it is more exciting as you can kind of predict the results you will get after you will update and republish your article.
So, make sure you will add updating old pages into your editorial calendar on regular basis and let me know how it works for you!
Related Articles:
- How to Use B2B SEO and B2B Content Marketing for Lead Generation (6 Easy Steps in 2022]
- 5 B2B Content Marketing Habits You Need for Awesome Quality Content (And Become Successful B2B Content Marketer)
- 158+ B2B Content Marketing Statistics to Drive More Leads
- B2B Digital Marketing Guide for Beginners in 2022
- Blog SEO: Best Tips & Practices to Get You Started
- B2B Blog Strategy: 9 Step Process Generate Success for Your Company
Also, check out our Content Marketing hub page to find all our Content Marketing resources.
Disclaimer
This article was created by Eduard Dziak and may contain affiliate links. The following were used to optimize the article for the best user and search engine experience include:
- SE Ranking for keyword research and on-page SEO optimization
- Surfer SEO for SEO-friendly content creation for users and search engines.
- Jasper AI for grammar correction and information enhancement.
The article is based on the author’s own experience and knowledge, drawn from both their own work and that of their clients, to provide the latest, proven methods.